
Landscaping projects have a way of growing in scope fast. What starts as a simple backyard refresh turns into removing old sod, tearing out overgrown shrubs, hauling away broken pavers, and suddenly you’re standing in the middle of a debris-filled yard wondering where all this material is going to go. That’s exactly where a roll-off dumpster rental earns its keep. Having a dedicated container on-site from day one is one of the simplest ways to keep your project moving without unnecessary interruptions, cleanup delays, or surprise costs along the way.
Whether you’re a contractor managing a large commercial landscaping job or a homeowner tackling a serious outdoor renovation, waste removal is a piece of the puzzle that gets underestimated more often than it should. Here’s a closer look at how having the right container on-site can protect your timeline and keep your project running the way it should.
Why Waste Removal Is a Bigger Deal Than Most People Expect?
When you’re in the planning phase of a landscaping project, it’s easy to focus on the exciting parts. The new planting design. The patio layout. The fresh mulch. Waste removal feels like an afterthought.
But debris accumulates fast on a landscaping job. A single day of excavation can produce more material than a pickup truck can handle. Gravel, soil, concrete chunks, root balls, sod, old landscape timbers, and broken retaining wall blocks all add up quickly. When there’s no clear plan for where that material goes, it piles up on the ground, blocks the crew’s working space, and creates a situation where the job slows down because workers are navigating around debris rather than making progress.
A roll-off container eliminates that problem. Instead of debris spreading across the site, everything goes directly into the container as the work moves forward. The crew stays organized, the site stays accessible, and the project keeps its momentum.
The Connection Between Waste Management and Project Timelines
Project delays on landscaping jobs often come down to a few recurring issues: weather, supply chain, and site organization. You can’t control the first two, but site organization is entirely within your control. Waste management is a major part of that.
Here’s what happens when waste removal isn’t planned properly:
The site gets cluttered. Piles of old sod, gravel, and broken stone take up usable workspace. The crew ends up working around piles instead of having clean, clear areas to stage materials and perform the next phase of work.
Haul-away runs eat up labor time. When there’s no container on-site, someone has to load debris into a truck and make trips to the disposal facility. Even two or three haul-away runs add several hours of unproductive labor to the project. That’s time and money that didn’t have to be spent.
Progress photos and inspections become harder. Anyone who manages landscaping projects professionally knows that clients and inspectors need to be able to see the work. A cluttered site makes it harder to communicate progress and harder to catch issues before they become expensive problems.
A container on-site solves all three. Debris goes directly into the roll-off, the crew keeps moving, and the site stays organized enough to actually see what’s happening.
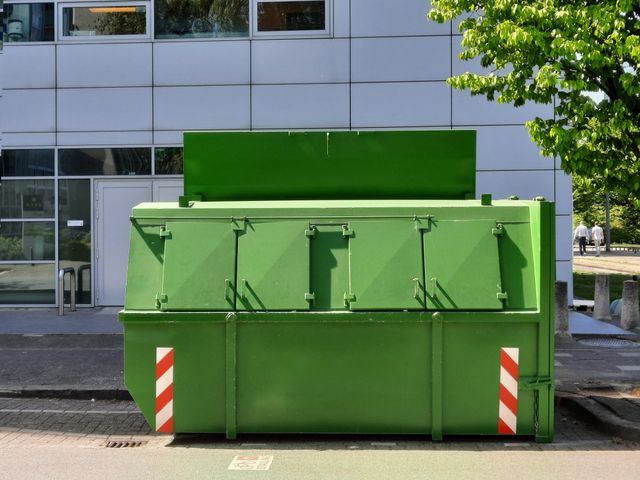
Matching the Right Container Size to Your Landscaping Job
One of the most common mistakes people make when renting a container is choosing a size that doesn’t fit the actual volume of debris the project will produce. Going too small means you’ll fill it before the job is done, and then you’re waiting on a swap-out while work stalls. Going too large isn’t a big deal in terms of function, but it does mean paying for more container than you actually needed.
Here’s a general breakdown to help you think through the right size for your project:
10-Yard container. Good for smaller landscaping cleanups, like removing a single flower bed, cleaning out a small area of overgrown brush, or hauling away a modest amount of sod and soil. It holds roughly the equivalent of 10 washing machines’ worth of debris and comes with 1.5 tons of disposal included.
20-Yard container. A solid choice for mid-size residential landscaping projects. Backyard renovations, patio demolitions, and moderate grading work often fall into this range. Comes with 2 tons of disposal included and holds roughly 20 washing machines’ worth of material.
30-Yard container. Better suited for larger property cleanups, significant grading projects, retaining wall removals, or jobs where multiple types of heavy material are involved. Comes with 3 tons of disposal included and holds roughly 30 washing machines’ worth of debris.
40-Yard container. Reserved for commercial-scale landscaping jobs, large property cleanouts, or any project generating heavy volumes of concrete, stone, or soil over an extended period. Comes with 5 tons of disposal included and holds roughly 40 washing machines’ worth of material.
One important thing to keep in mind: every container has a DOT maximum weight limit of 10 tons regardless of size. Landscaping materials like soil, gravel, and concrete are particularly dense and can push weight limits faster than people expect. If your project involves a lot of heavy material, it’s worth talking through the specifics with your rental company before booking so you can plan for weight and not just volume.
Placement Matters More Than You Think
Roll-off containers are large pieces of equipment, and placing them correctly on a landscaping job takes a little advance thought. On a standard residential property, the driveway is usually the most practical option. A solid, paved surface supports the weight of the container without causing damage, and it keeps the container accessible without blocking the actual work area.
If you’re working on a property where the driveway isn’t an option, or where the landscaping work is happening in a location that’s far from the street, it’s worth having a conversation with your rental company before delivery day. They can help you think through placement based on your specific site, including any access constraints like low-hanging branches, tight turns, or overhead utility lines that could affect delivery.
Street placement is sometimes possible but typically requires a permit from the local municipality. Permit requirements vary from one area to another, so if street placement is the only viable option for your job, confirm what’s required ahead of time. A good rental company will be able to tell you what typically applies in your area and help you plan accordingly.
Landscaping Materials: What Goes in and What Doesn’t
Most standard landscaping debris is perfectly acceptable to place in a roll-off container. Sod, soil, mulch, brush, tree branches, broken concrete, pavers, gravel, lumber, and general yard waste are all common materials on landscaping jobs, and they can all go in.
Where things get more complicated is with regulated materials. Treated lumber, old irrigation systems that may contain chemicals, and any materials that were part of structures involving regulated substances fall into a different category. If you’re not sure whether something you’re removing counts as regulated waste, it’s always better to ask before you load it than to deal with a problem after the fact.
Most reputable rental companies will walk you through what’s acceptable during the quoting process, so you’re not left guessing on delivery day.
Scheduling Your Container Around Your Project Phases
On a well-planned landscaping job, the container isn’t just sitting there waiting. It’s working in phases alongside your crew. Here’s how that can look in practice:
Phase one, demolition and removal. Old hardscape comes out, sod gets stripped, overgrown vegetation gets cleared. All of this goes directly into the container as the crew moves through the site.
Phase two, grading and excavation. Excess soil, rock, and debris from grading go into the container. If volume is high, a swap-out may be needed before moving on.
Phase three, construction and installation. Packaging waste, cut material scraps, and miscellaneous debris from installing new hardscape, plantings, or irrigation goes in as the work progresses.
Phase four, final cleanup. Any remaining material that didn’t make it into the container during earlier phases gets cleared out. The container is pulled, and the site is clean.
Planning the container rental around your project phases, rather than treating it as a single delivery and pickup transaction, gives you far more flexibility and control over how the job flows.
The Bottom Line
A landscaping project moves at the speed of your least organized process. For a lot of jobs, that weak link is waste removal, and it doesn’t have to be. A properly sized roll-off container, placed correctly, scheduled around your project phases, and filled strategically is one of the most straightforward investments you can make in keeping your job on time and on budget.
If you’re planning a landscaping project and want to make sure the waste side of things is handled before the first shovel hits the ground, reach out to a reputable dumpster rental company early in your planning process. A quick conversation about your project scope, site access, and debris types can save a lot of headaches once the work gets started.
Want to know more? Just head to our website!